Node.js tutorial for beginners | Learn NodeJS


")


This Node.js tutorial is perfect for beginners who want to learn how to programme with Node.js. You will learn the basics of Node.js, the most important concepts and see many code examples.
This Node.js tutorial is very practice-orientated and comprehensive. This means that I start by explaining how Node.js works, the typical areas of application and the installation of Node.js and then explain a lot of code in a practical way. Everything that a Node.js tutorial for beginners should contain. The practical part starts in chapter 3. That’s what’s on the programme today:
- 1. What is Node.js?
- 2. Install Node.js
- 3. The CLI as a tool for Node.js
- 4. Node.js Packages (Modules)
- 5. Create first Node.js App
- 6. Improve Node.js workflow - with Nodemon
- 7. Environment variables in Node.js
- 8. Node.js Webserver with Express
- 9. Reading files with Node.js (Node I/O)
- 10. Deploy (publish) Node.js app
- Questions still open? - Node.js FAQ
- More Tutorials
1. What is Node.js?
Node.js (also known as Node or NodeJS) is JavaScript that is executed in the backend, i.e. on the server side. Before Node.js, JavaScript was mainly only responsible for the front end and interaction with the visitor.
With Node.js, however, it is now possible to develop everything from small CLI (command line) tools to complex programmes and stand-alone HTTP servers. It is precisely this universal applicability that makes Node.js so brilliant for me personally – and for many other developers too! It doesn’t matter whether you host your application on your own server or develop serverless applications on AWS – you can’t go wrong with Node.js.
And what do I need Node.js for now?
When a website is called up, the JavaScript code is executed at the visitor, i.e. client-side. With Node.js, on the other hand, JavaScript is executed on the requested server, i.e. server-side. This is the most obvious difference and sounds unspectacular at first.
However, this fact changes most of the uses of JavaScript. In the browser, JavaScript is mainly responsible for manipulating the DOM. In Node.js, this task falls away and it is available for returning data. Thereby Node.js can also connect to a database (e.g. MySQL or MongoDB).
So Node.js acts as a kind of web server. We will pick up on this point and write our own web server with Node.js later in this tutorial.
All clear?
If you are now wondering if you really need and want to be able to use Node.js, you should read through the most frequently asked questions below and decide if Node.js is the right technology for you.
Another important reason for the success are the on-board tools that come with Node.js. From the ground up, Node.js already has many features and modules that are easy to use. And to make it even more perfect, there is the package manager – also called npm (Node Package Manager). You can find more information about it later in the Node.js Packages section. Anyway, it makes it very easy to add new features, extensions from other developers and the Node.js community.
Of course, this sounds promising at first, but can you already imagine something concrete? Probably not. At least it wouldn’t be very easy for me to read something like that about a topic I don’t know. That’s why it’s best to read this section again at the end of this post and I assure you, you’ll know what I’m talking about! 😉
2. Install Node.js
Before we can start with the actual programming, we first have to install Node.js on our computer. To do this, select the operating system on which you want to develop.
2.1 Install Node.js on Windows
On Windows, you can simply download the installer and follow the installation instructions. It is best to download the LTS (Long-term support) version, as this is already established and has fewer bugs than the latest version.
2.2 Install Node.js on the Mac
On the Mac, just like on Windows, you can download the official installer and follow the installation instructions. Again, it is best to download the LTS (Long-term support) version, as this is already established and has fewer bugs than the latest version.
2.3 Install Node.js on Linux
Depending on the Linux distribution you choose the appropriate installation command.
3. The CLI as a tool for Node.js
CLI stands for Command-Line Interface and means command line. On the Mac you can use the pre-installed program “Terminal” and on Windows the command prompt (cmd.exe).

The CLI can be used to launch Node.js applications, install modules, and view error messages and log output.
Using the node command, we can now execute any JavaScript commands. In the further course of this article you now know what you can understand by the CLI.
4. Node.js Packages (Modules)
The crown jewels of Node.js are its packages. At the beginning I already mentioned that Node.js has a package manager. The abbreviation and the command for the CLI is npm (Node Package Manager).
NPM is a gigantic network of development tools that you can download for free for your application. If you work with Node.js, you will always use modules from other developers.
This offers many advantages:
- Time saving, because you don’t have to program everything yourself
- Security vulnerabilities are (usually) closed promptly and you can update such a dependency with a command
- Standardization ensures easier handling between multiple developers
- Good documentation on existing interfaces
4.1 Package installation
In this example we download the module express. This works with the following command:
npm install express
You can also install modules globally, which means that it applies to your entire computer and is not only available in one project. To do this, simply append the -g parameter.
npm install -g express
Some modules are also only required for development and are later superfluous in productive use. If you use the --save-dev parameter, these are created as dev dependencies – i.e. only required for development.
npm install --save-dev dotenv
When you install a module, a corresponding entry is created in the package.json and the folder node_modules is created automatically. This contains all installed modules and can be ignored by you for now.
Tip: If you work with git, for example, you can exclude the node_modules folder in your .gitignore. The folder can be recreated using the npm install command when you load your project on a different device.
4.2 Integration in source code
We can include a module in the code with the require() function:
const express = require('express');
4.3 Update packages
To take advantage of the already mentioned regular (security) updates you can always keep your packages up to date. You can simply use this command:
npm update
5. Create first Node.js App
Now we come to the really exciting part of this Node.js tutorial. The creation of your first app! To help you follow each step, I’ve put the source code of each step into a Git repository, which you can find here.
5.1 Create project folder
The time has come, we are finally starting to program. To create a Node.js project, we simply create a normal folder in any directory. In it we create an index.js, which is our start file.

index.jsNow we need to say in this folder that we want to make it a Node.js app, we do that via this command in the CLI:
npm init
We will be asked for several parameters like package name, version and description. You can fill in these fields or like me just leave them on default settings. We can always change these settings later in the package.json.
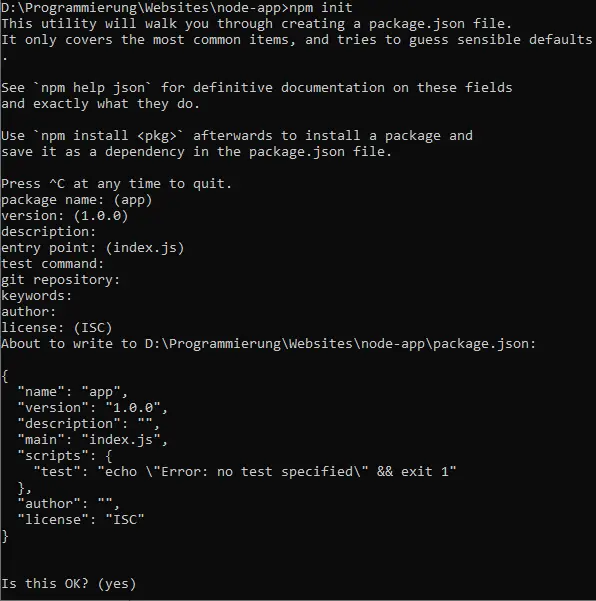
npm init command5.2 Write & execute program code
Now we can write the first JavaScript code in our index.js. Of course we can’t do without it and have to output “Hello World”.
// index.js

console.log('Hello World');
The first code is written and we want to start our program. We do that with this command:
node index.js
We get the following result:

Granted, at the beginning of the Node.js tutorial, this all sounded much cooler. But don’t worry, there’s more. 🙂
You can e.g. try JavaScript functions in this file to e.g. simply add two numbers and output them on the console. Just play around with it for 10 minutes and then read on.
5.3 Get to know package.json
A package.json file has now been created in our folder. In this file all information about our application, such as the author, version and most importantly, about all installed dependencies (packages) are stored in JSON.
// package.json

{
  "name": "app",
  "version": "1.0.0",
  "description": "",
  "main": "index.js",
  "scripts": {
    "test": "echo \"Error: no test specified\" && exit 1"
  },
  "author": "",
  "license": "ISC"
}
If you install packages, they will also appear in this list. Under dependencies you will find all “normal” dependencies and under devDependencies you will find all packages that were installed with the parameter --save-dev. Reminder: These are only necessary for development and are no longer installed in production use.
{
   "name":"app",
   "version":"1.0.0",
   "description":"",
   "main":"index.js",
   "scripts":{
      "test":"echo \"Error: no test specified\" && exit 1"
   },
   "author":"",
   "license":"ISC",
   "dependencies":{
      "express":"^4.17.1"
   },
   "devDependencies":{
      "dotenv":"^16.0.0"
   }
}
Under scripts you can create your own scripts, e.g. to execute test routines automatically or to automate other tasks. If you want to learn more about this, have a look at this tutorial.
6. Improve Node.js workflow – with Nodemon
It’s really annoying when we have to manually restart our Node.js app after every small change to the code, right? Right, that’s why there is a module called nodemon which we install globally. This module detects file changes and restarts the Node.js app within milliseconds. This speeds up our workflow tremendously.
npm install -g nodemon
After the installation we start Nodemon via this command and directly our app is started and automatically restarted in case of changes.
nodemon index.js
Now when you save your files inside the project folder, the Node.js app will automatically restart.
7. Environment variables in Node.js
I don’t want to deprive you of one very central function: Environment variables
They are quite an important thing when it comes to variable properties like credentials, configuration email addresses or file paths. Here is an example:
You have a local database running on your local PC with the user test and the password 123456 (hopefully not 🙂 ). If you want to connect to it with your Node.js application, you would have to include these credentials statically in your source code. But on your production system you have completely different credentials. So no connection can be established. And using the same credentials is not an option, because it is insecure, sometimes not feasible and also in cases like changing file paths not feasible at all. And that’s why we use environment variables.
You provide a kind of project global variable in which we can store the required data. Our application then fetches this data automatically. On our live system we can then work with completely different values without having to adapt our source code.
For the development we use the package dotenv (npm install dotenv --save-dev) and create the file .env in our main directory and write there one variable with value per line.
DATABASE_HOST=localhost
DATABASE_USER=test
DATABASE_NAME=testDB
DATABASE_PASSWORD=123456
To access it in our Node.js app, we need the line highlighted in red. Via process.env.VARIABLE we can then retrieve the corresponding value.
// index.js

require("dotenv").config();

console.log("Host: " + process.env.DATABASE_HOST);          // Host: localhost
console.log("Database: " + process.env.DATABASE_NAME);      // Database: testDB
console.log("Username: " + process.env.DATABASE_USER);      // Username: test
console.log("Password: " + process.env.DATABASE_PASSWORD);  // Password: 123456
Attention: The .env file should not be uploaded to your git repository and should not be made public, because it may contain sensitive access data! Just add the file to your .gitignore.
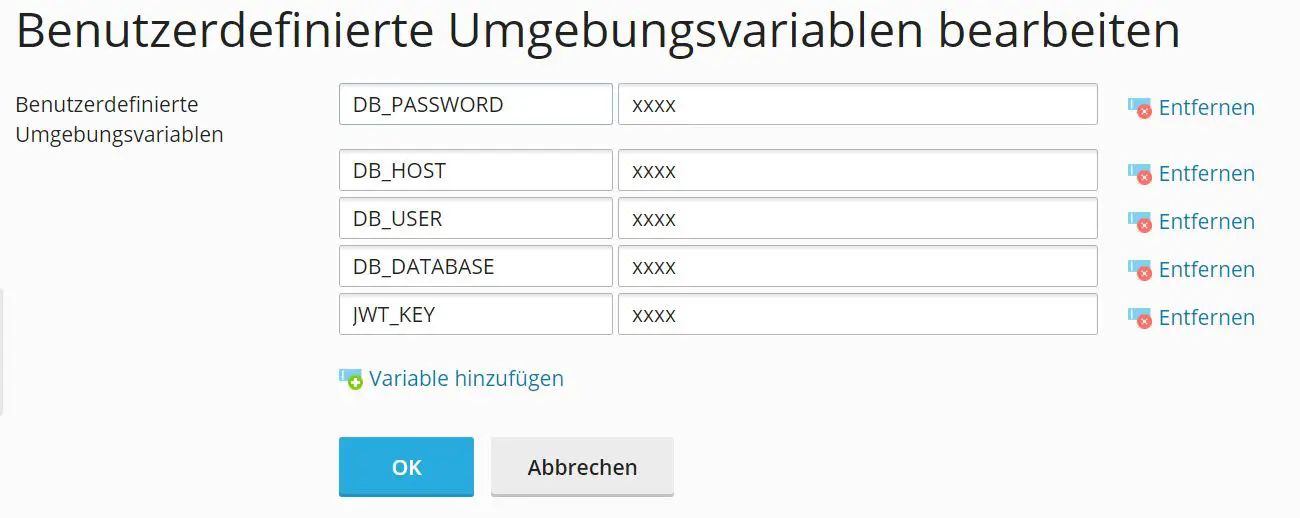
When our application is running on a production system, the .env file is no longer needed. The environment variables are then set in other places – this varies depending on the hosting.
In my Plesk hosting this view looks like this:
8. Node.js Webserver with Express
8.1 Set up Express web server
We can now write and execute functions and output texts from the console. However, the user of our application has nothing of this, since he can only access it via the browser.
So now we set up a web server and deliver content to the user in the browser. Exactly the same thing happens when a website is called up.
To do this, we install the express module using the following command, if not already done in step 4:
npm install express
And we customize our index.js as follows:
// index.js

const express = require('express');
const app = express();
const PORT = process.env.PORT || 3000;

app.get('/', (request, response) => {
  response.send('Our first Node.js webserver');
});
app.listen(PORT, () => console.log(`Server running on port ${PORT}`));
To help you understand everything, here’s a line-by-line explanation:
| Line | Description |
|---|---|
| Line 3 | Embedding the express module. |
| Line 4 | Initialization of the express module in the variable app. |
| Line 5 | Create constant PORT and initialize with value from environment variable. If the entry is empty or does not exist, 3000 is used. |
| Line 7 | We intercept the page call from / our server to perform an action. Such a call is called a route. |
| Line 8 | We send back the text “Our first Node.js webserver” as a response to the requester. |
| Line 10 | We start our web server on port PORT and print a message in the console. |
If we now request our computer on port 3000 from the browser, we get this result:
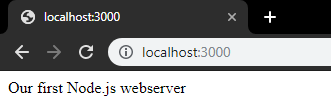
Simple, right? That’s why Node.js is so awesome. You need just seven lines of code for your own web server.
8.2 Excursus: HTTP Request Methods
Let’s take a break from coding for a moment, we need a small theory block for HTTP request methods.
A request from a client (e.g. browser) to a server is called a request. The response from the server to the client is called Response. We use the variables req and res in front of it in the code. When you call a website, a GET request is executed in the background. But there are many more types, which are especially important for the development of Rest APIs. Here are the most important ones in short form:
- GET: Requests resources from the server
- POST: Sends data (e.g. in the request body) with which the server is to create a new resource.
- PUT: Also sends data to the server with which it should update an existing resource
- DELETE: Deletes a resource from the server
Resources can be very different things: a temporary object, an entry from a database or a simple file. It depends on your application.
A list of all available HTTP request methods can be found here. If you want to know more about HTTP request methods, I can recommend this article.
In this tutorial we will only use the GET method. You can find more tutorials at the end of this post.
8.3 Process parameters
Now, if we adjust our route a little bit, we can return data that has already been passed:
// index.js

const express = require('express');
const app = express();
const PORT = process.env.PORT || 3000;

app.get('/:yourName', (req, res) => {
  res.send('Your name: ' + req.params.yourName);
});
app.listen(PORT, () => console.log(`Server running on port ${PORT}`));
Here :yourName stands for a variable string (note the colon!) that we can pass in our URL and with req.params.yourName we can read it and send the name back to the user.
If we now call http://localhost:3000/test, we get the string with the passed name as response.
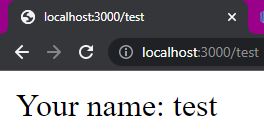
With it you can already read and send data and that with really little code.
This approach is the basis for creating a Rest API. Meanwhile, you should also always test your application directly for anomalies and write test cases.
A post on creating Rest APIs with Node.js is already in the works. Rest APIs are the main use of Node.js and therefore so essential! If you don’t want to miss this, feel free to subscribe to our newsletter!
9. Reading files with Node.js (Node I/O)
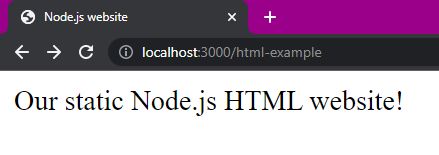
We now want to use our Node.js server to send simple static HTML files to the browser. To do this, we first create an HTML file with our website in the public folder.
<!-- public/example-page.html -->

<!DOCTYPE html>
<html lang="en">
  <head>
    <meta charset="UTF-8" />
    <meta http-equiv="X-UA-Compatible" content="IE=edge" />
    <meta name="viewport" content="width=device-width, initial-scale=1.0" />
    <title>Node.js website</title>
  </head>
  <body>
    <h1>Our static Node.js HTML website!</h1>
  </body>
</html>
Important: In the public folder you should only put files that are also “intended for the public”. This convention is important to avoid sharing private/sensitive code.
We now create a GET route for the path /html-example. There we use on our res variable the function sendFile() to pass a path where our file is located. As second parameter we can specify an array with further options. There we pass the property root with the constant __dirname. This contains the current path where the JS file is located.
Around it we have a try-catch block in case the file cannot be read.
// index.js

const express = require("express");
const app = express();
const PORT = process.env.PORT || 3000;

app.get("/html-example", (req, res) => {
  try {
    res.sendFile("public/example-page.html", { root: __dirname });
  } catch (err) {
    console.log(err);
  }
});

app.listen(PORT, () => console.log(`Server running on port ${PORT}`));
If we now call http://localhost:3000/html-example, our static HTML page appears.
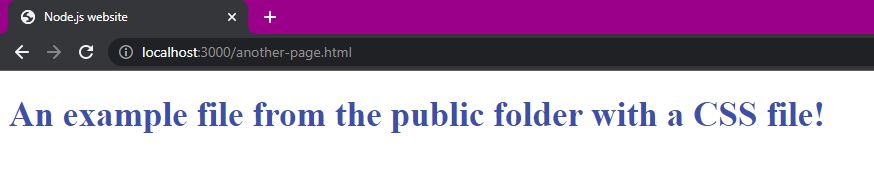
Deploy all files statically with Node.js
If we want Node.js to act only as a web server and just serve all the files that are in the public folder, we can implement this with a simple line:
// index.js

const express = require("express");
const app = express();
const PORT = process.env.PORT || 3000;

app.use(express.static("public"));

app.listen(PORT, () => console.log(`Server running on port ${PORT}`));
I have created another-page.html and included a CSS file. All files can now be easily accessed by name: http://localhost:3000/another-page.html
10. Deploy (publish) Node.js app
Many Node.js tutorials forget to show how to eventually deploy (publish) a Node.js app. Most of the time they just stop after the basics.
You can of course run your app locally, but it doesn’t make sense if you want to share an app with others.
A free way to host Node.js apps is Heroku. You can simply follow this guide. Of course, the free model at Heroku doesn’t have all the features, e.g. you can’t use your own domain.
Another possibility to deploy a Node.js app is the own server with Plesk as administration software. Such servers are already available for less than 10 Euros per month and are perfectly suitable for development, testing and also for productive use! To deploy Node.js apps with Plesk you can find a tutorial here.
Questions still open? – Node.js FAQ
Node.js is primarily used for “normal” dynamic websites and backend APIs (Rest APIs). In addition, Node.js is often used for applications that need to process data in real time (e.g. chats).
Definitely no. Node.js combines the JavaScript scripting language and a networking component. Because Node.js was developed on the Google V8 JavaScript engine, Node.js masters networking basics such as the HTTP, DNS, and TCP protocols.
Since Node.js is not a framework or a programming language, one must rather ask whether it is easy to learn JavaScript. Yet surveys have shown that JavaScript is one of the easiest scripting languages to learn.
A middleware is a partial program, i.e. a function that is executed between two components. For example, when the user calls /settings, the actual program code should only be executed when the user is logged in. To do this, you write a middleware function and call this function before it. You do this so that you can use the same code (checking the login) multiple times, but only have to write it once.
You can host Node.js apps for free at Heroku. However, if you have your own server, you can host your own Node.js app in Plesk for free, for which I have created a complete guide here.
The package.json contains information about the name, the author, etc. for Node.js apps. Most important here are the dependencies. This is a list of modules (dependencies) that your app uses. Also, under scripts you can define commands to run or test your app.
A dependency tree is stored in the package-lock.json – i.e. information about all installed packages. This ensures that your app is 100% reproducible on another system and that all package versions work together.
The node_modules folder contains all modules that are included in your Node.js. Among other things, it contains standard modules, but also all modules that you have installed additionally and are listed in the package.json under scripts. You don’t need to push the node_modules folder to your Git repository or to live hosting, because the npm install command will re-download all modules to the folder.
More Tutorials
Pooh! Quite a lot of information at once, isn’t it? Nevertheless, I hope you got a good impression of what’s possible with Node.js and that I made you curious for more.
If you have any unanswered questions, feel free to post them in the comments! 🙂
On my blog you can find many more tutorials and articles about Node.js. Scroll down a little bit, there you will see more posts.
-
Pingback: Docker Init command: Create Docker projects automatically
-
Pingback: TOP 20 VSCode Extensions to increase your productivity!
-
Pingback: Node.js Login System with Express, JWT & MySQL (Authentication System)
-
Pingback: Programming Real Time Charts & Graphs with JavaScript
-
Pingback: Double Opt-In in Node.js: Sending confirmation emails
-
Pingback: Rest API Testing with Postman: Approach and Strategies
-
Pingback: Vue i18n - How to create multilingual Vue.js apps!
-
Pingback: Vue i18n - How to create multilingual Vue.js apps! » webdeasy.de
-
Pingback: Programming a game with Vue.js!? Yes, you can! » webdeasy.de
-
Pingback: Complete login system with Node.js & Vue.js | RestAPI & JWT | Part [1/2] ? » webdeasy.de