Vue i18n: How to translate your Vue.js App with vue-i18n


")


Multilingual Vue.js Apps? No problem! In this tutorial you’ll learn how to use the Vue i18n library to translate your Vue App.
Vue.js offers the possibility to translate a page or app into several languages via the NPM package vue-i18n. Language files containing the translations are used for this purpose and output to the user in the desired language.
And this is what you can expect in this Vue i18n tutorial:
1. Install Node.js + Vue CLI
This article is primarily about the integration of multiple languages for your Vue App. Therefore I assume that you have already installed Node.js and the Vue CLI. Not yet? Then you will find here 3 great examples to learn Vue.js and here you will find the ultimate Node.js beginner tutorial.
Or you can read this guide from the developers: https://cli.vuejs.org/guide/installation.html
2. Create project and install Vue i18n
At the beginning we create a new Vue.js project with this command:
vue create vue-multilang
Then we are asked for a preset. These are presets and modules that should be installed directly.

It makes sense to create your own preset, which you can use for further projects. Mine is displayed at the top and is called “lh-standard”. But in this case we select “Manually select features” and continue manually.
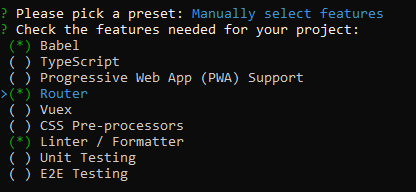
Here it is important that we select the router module with a space bar. The other options are a matter of taste, but not absolutely necessary for the translations.
After successful installation we navigate to the created folder.
cd vue-multilang
Additionally we install now the module “vue-i18n”, which we absolutely need. This extension takes care of the translations.
npm install vue-i18n
Here you can go directly to the official website of the package developer.
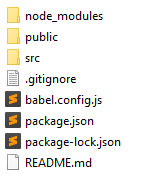
After that the created folder should look like this (or similar):
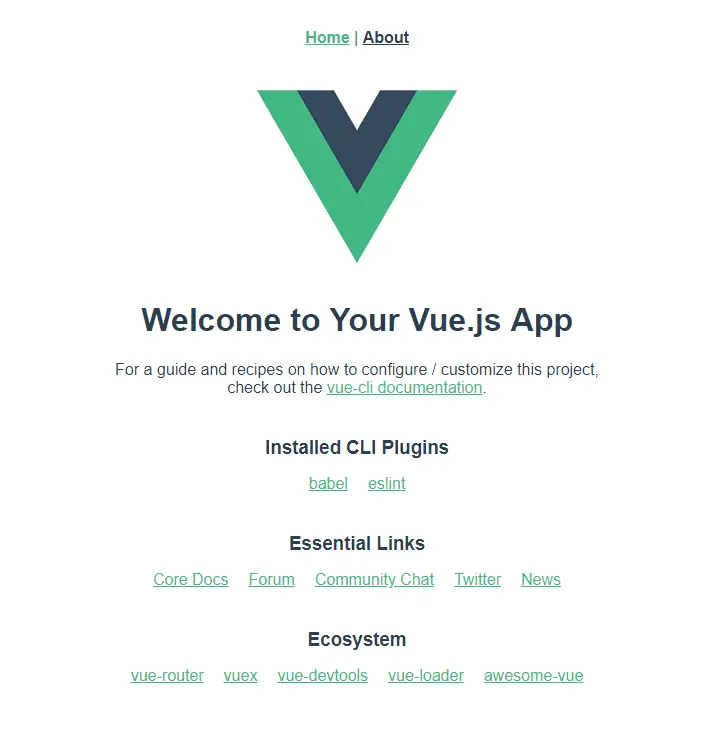
Here we go: We can start our Vue.js application for the first time.
npm run serve
If we now open the browser http://localhost:8080/ this default Vue website should appear. Hooray!
3. Integrate Vue i18n and load language files
In the next step we have to say our Vue.js application: Hey, we want to have a multilingual site, please use the module vue-i18n.
Here you can see the main.js file of your app. We have to add the marked lines to include vue-i18n. You can set the variables locale and fallbackLocale to the language code of your default language.
// src/main.js

import Vue from "vue";
import App from "./App.vue";
import router from "./router";
import store from "./store";
import VueI18n from 'vue-i18n';
import messages from './lang';

Vue.config.productionTip = false;

Vue.use(VueI18n);
export const i18n = new VueI18n({
	locale: 'de',
	fallbackLocale: 'de',
	messages
});

new Vue({
  router,
  store,
  i18n,
  render: h => h(App)
}).$mount("#app");
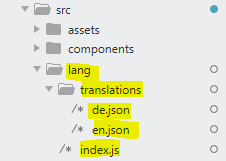
The variable messages should contain our translations. For this we have to create a long directory. The structure should look like this.
In the index.js we import all language files in which our page should be available.
// src/lang/index.js

import de from './translations/de';
import en from './translations/en';

export default {
	de,
	en
};
The JSON files in the translations subfolder contain the translations for the respective language.
// src/lang/translations/de.json

{
	"translation1": "Übersetzung 1",
	"translation2": "Übersetzung 2"
}
4. Configure Router
With the previous configuration we could now output our translated texts. However, we can and should include the language abbreviation in the link of each page. Especially for search engines this is an important point. Our URLs should look like this: https://example.com/de/home
In order to be able to access our site in different languages, we have to provide the language code for each route and load the corresponding translations.
For this I have adjusted the default router.js a bit. We pass a variable lang as the first parameter. This variable forms our language code. All other pages are children of this route. In the event beforeEnter we set the default language if no language code was passed.
// src/router.js

import Vue from "vue";
import Router from "vue-router";
import Home from "./views/Home.vue";
import RouterView from "./views/RouterView.vue";

import { i18n } from "./main.js";

Vue.use(Router);

export default new Router({
  mode: "history",
  base: process.env.BASE_URL,
  routes: [
    {
      path: "/:lang",
      component: RouterView,
      beforeEnter(to, from, next) {
        const lang = to.params.lang;
        if (!["en", "de"].includes(lang)) return next("de");

        if (i18n.locale !== lang) {
          i18n.locale = lang;
        }
        return next();
      },
      children: [
        {
          path: "home",
          name: "home",
          component: Home
        },
        {
          path: "about",
          name: "about",
          // route level code-splitting
          // this generates a separate chunk (about.[hash].js) for this route
          // which is lazy-loaded when the route is visited.
          component: () =>
            import(/* webpackChunkName: "about" */ "./views/About.vue")
        }
      ]
    },
    {
      path: "*",
      redirect: "/de"
    }
  ]
});
I got the code for the beforeEnter function from this post.
To make our subpages work we include the View RouterView.vue. This template contains as template only an empty router-view.
// src/components/RouterView.vue

<template>
	<router-view></router-view>
</template>
5. Output translations
Now we can access our pages. But instead of https://example.com/home we call https://example.com/de/home.
We get the page displayed normally.
Now the most important thing: The output of the texts. For this we can simply use this syntax:
<p>{{ $t('translation1') }}</p>
The string in brackets is the key from the JSON translation file. And that’s all.
Menu
We also have to adjust our menu links a little. Before they looked like this:
<router-link to="/home">Home</router-link> |
<router-link to="/about">About</router-link>
So we can integrate the current language code (note the colons before the to):
<router-link :to="'/' + $i18n.locale + '/home'">Home</router-link> |
<router-link :to="'/' + $i18n.locale + '/about'">About</router-link>
6. Change language
In the code we can also change the language manually. We simply enter the new language code. With the variable this.$i18n we also have access to the current language. This is available globally in your Vue.js app.
this.$i18n.locale = 'en';
7. Installing language switching
We now want to give our visitors the opportunity to choose between the available languages. Here is an example of the code for a language switch. The available languages are simply listed and set as the current language when clicked.
// src/components/LanguageSwitcher.vue

<template>
	<div class="locale-changer">
		<select v-model="$i18n.locale">
			<option
				v-for="(lang, i) in langs"
				:key="`Lang${i}`"
				:value="lang"
				>{{ lang }}</option
			>
		</select>
	</div>
</template>

<script>
export default {
	name: 'LanguageSwitcher',
	data() {
		return { langs: ['de', 'en'] };
	}
};
</script>
8. 301 Creating redirects for old pages
If your site is already live and you add multilingualism afterwards, it is important to redirect old sites with a 301 to avoid annoying search engines. To do this, you can simply add routes of this type to your router.
{
  path: '/foobar',
  redirect: '/de/foobar'
}
That’s it! That’s it! Now you know the most important thing about multilingual pages in Vue.js. Thanks for reading and see you next time! 🙂
Thank you for sharing.
Could you add more function to keep language changed after refreshing page?
Thank you,
What functions do you mean? You can adapt the template from point 6 according to your wishes. 🙂
LH