Vue.js Login System with Vuex & Axios


")


In this article you will learn how to create a complete Vue.js login system with Vue.js, Vuex and Axios.
This article is the first part of a two-part series to create a complete login system with Node.js and Vue.js. For this we use Vue.js as frontend and Node.js as backend.
The tutorial is divided into two parts so that you are not bound to a Node.js, but can use the Vue.js frontend with another system of your choice, like PHP or Python.
This way to part 1: Node.js Login System with Express, JWT & MySQL (Rest API)
Our goal: Vue.js Login – with Vuex and Axios
We create a Vue.js frontend where we create a session for the user, store it, and can access it over and over again to check if a user is logged in and has a valid session. We use Vue CLI, Axios, Vuex and the vuex-persistedstate module to temporarily store the session.
At the end you have a web application where users can register and log in. In addition, some pages should only be accessible if the user has a valid session, i.e. is logged in. But now we finally want to start!?
1. How Vuex works
Vuex is a kind of “store” in which different states are stored. If this data is adjusted, your Vue Component updates itself automatically. We use this to save the login status of the user to get access to different routes and to display adapted texts, etc.
We also use vuex-persistedstate to keep the data even after reloading the page. But more about this in step 3.
2. Install Vue CLI and initialize Vue App
At the beginning we install the Vue CLI – if not already done – with the following command:
npm install -g @vue/cli
If you have installed Vue CLI 1.x or 2. and want to update to a newer version, you must first uninstall the old version using npm uninstall vue-cli -g.
Then we can initialize our Vue App via Vue CLI. We do this with the following command:
vue create client
If the vue command in your console does not work on Windows, you can try to adjust the PATH environment variables as follows: C:\Program Files\nodejs\node.exe;C:\Users{YOUR_NAME}\AppData\Roaming\npm. After a restart of the CMD the command should work.
We have to select different components and modules that should be installed as standard. Here it makes sense to create your own preset (here “lh-standard”) and use it for future projects. So you should select “Manually select features” here. For this tutorial we absolutely need the modules vue-router and vuex. Everything else is optional.

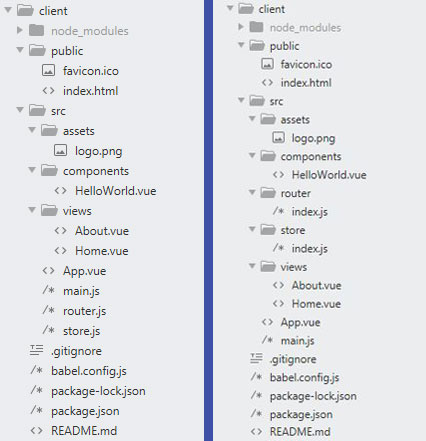
Once the process is complete, you will receive a folder with this (or similar) structure.
3. Install dependencies
The next step is to install additional packages. Among them axios to send HTTP requests and vuex-persistedstate to get the data from Vuex even after reloading the page.
npm install axios vuex-persistedstate
4. Create Routes
Now we’ll plot three routes:
- …/ => This route should only be accessible for logged in users.
- …/sign-up => Registration page
- …/login => Login page
We adapt the standard router file and assign each route its own Vuex View.
// src/router.js (Vue CLI 1.x & 2.x) or src/router/index.js (Vue CLI 3.x or newer)

import Vue from "vue";
import Router from "vue-router";
import Home from "./views/Home.vue";
import SignUp from "./views/SignUp.vue";
import Login from "./views/Login.vue";

Vue.use(Router);

export default new Router({
  mode: "history",
  base: process.env.BASE_URL,
  routes: [
    {
      path: "/",
      name: "home",
      component: Home
    },
    {
      path: "/sign-up",
      name: "sign-up",
      component: SignUp
    },
    {
      path: "/login",
      name: "login",
      component: Login
    },
  ]
});
If you haven’t tested your Rest API yet, you can try this strategy for testing Rest APIs.
5. Set up Vuex
The next step is to set up Vuex. Therefore we integrate the plugin vuex-persistedstate (lines 6 and 19). This helps us to get data even after reloading the page.
To “save” the data we now create the status token and user. We also create actions for login and logout. Very important: In line 46 we set the JWT token of our Rest API as Authorization Header. Without this line all future requests to the Rest API would not work!
If you want to know more about Vuex, you can read it here.
// src/store.js (Vue CLI 1.x & 2.x) oder src/store/index.js (Vue CLI 3.x or newer)

import Vue from 'vue';
import Vuex from 'vuex';
import Axios from 'axios';
import createPersistedState from 'vuex-persistedstate';

Vue.use(Vuex);

const getDefaultState = () => {
	return {
		token: '',
		user: {}
	};
};

export default new Vuex.Store({
	strict: true,
	plugins: [createPersistedState()],
	state: getDefaultState(),
	getters: {
		isLoggedIn: state => {
			return state.token;
		},
		getUser: state => {
			return state.user;
		}
	},
	mutations: {
		SET_TOKEN: (state, token) => {
			state.token = token;
		},
		SET_USER: (state, user) => {
			state.user = user;
		},
		RESET: state => {
			Object.assign(state, getDefaultState());
		}
	},
	actions: {
		login: ({ commit, dispatch }, { token, user }) => {
			commit('SET_TOKEN', token);
			commit('SET_USER', user);

			// set auth header
			Axios.defaults.headers.common['Authorization'] = `Bearer ${token}`;
		},
		logout: ({ commit }) => {
			commit('RESET', '');
		}
	}
});
So that the JWT token is passed also with each call, we must still adapt the main.js as follows.
// src/main.js

import Vue from 'vue';
import App from './App.vue';
import router from './router';
import store from './store';
import Axios from 'axios';

Vue.config.productionTip = false;

// set auth header
Axios.defaults.headers.common['Authorization'] = `Bearer ${store.state.token}`;

new Vue({
	router,
	store,
	render: h => h(App)
}).$mount('#app');
6. Services for registration and login
We create a new file AuthService.js to make requests to our server (Rest API). For this we need a function login(credentials) for the login and the function signUp(credentials) to register. Here you need our package axios, which we already installed in step 3.
The third function getSecretContent() returns the secret content, which is only displayed if you are logged in.
// src/services/AuthService.js

import axios from 'axios';

const url = 'http://localhost:3000/api/';

export default {
	login(credentials) {
		return axios
			.post(url + 'login/', credentials)
			.then(response => response.data);
	},
	signUp(credentials) {
		return axios
			.post(url + 'sign-up/', credentials)
			.then(response => response.data);
	},
	getSecretContent() {
		return axios.get(url + 'secret-route/').then(response => response.data);
	}
};
7. Sign Up page
The probably most important step: The registration of new users. We have already created a route in the router and are now creating the appropriate Vue View. Here we have a simple form with user name, password, password repetition and a button to register.
When clicking, we call the signUp(credentials)function from the AuthService and pass the entered user data. Additionally we have a field in which error and success messages are displayed automatically: msg.
// src/views/SignUp.vue

<template>
	<div>
		<h1>Sign Up</h1>
		<input type="text" placeholder="Username" v-model="username" />
		<input type="text" placeholder="Password" v-model="password" />
		<input
			type="text"
			placeholder="Password (repeat)"
			v-model="password_repeat"
		/>
		<input type="button" @click="signUp" value="Sign Up" />
		<p v-if="msg">{{ msg }}</p>
	</div>
</template>
<script>
import AuthService from '@/services/AuthService.js';

export default {
	data() {
		return {
			username: '',
			password: '',
			password_repeat: '',
			msg: ''
		};
	},
	methods: {
		async signUp() {
			try {
				const credentials = {
					username: this.username,
					password: this.password,
					password_repeat: this.password_repeat
				};
				const response = await AuthService.signUp(credentials);
				this.msg = response.msg;
			} catch (error) {
				this.msg = error.response.data.msg;
			}
		}
	}
};
</script>
Optionally you can redirect to the login page after line 38. You can use this code for this:
this.$router.push('/');
If we call this page we will get this result with full functionality:
Ever heard of Double Opt-In? It involves sending confirmation emails to verify a registration. In this tutorial you will learn how to implement Double Opt-In in your Node.js application.
8. Login page
At login we have a similar structure and this time we call the login(credentials) function.
It is important to call Vuex in line 36. We pass the user object user and the token token from the HTTP response and write the data in Vuex.
After successful login, line 38 will forward you to the “protected route”, which should only be accessible after login.
// src/views/Login.vue

<template>
	<div>
		<h1>Login</h1>
		<input type="text" placeholder="Username" v-model="username" />
		<input type="text" placeholder="Password" v-model="password" />
		<input type="button" @click="login" value="Login" />
		<p v-if="msg">{{ msg }}</p>
	</div>
</template>
<script>
import AuthService from '@/services/AuthService.js';

export default {
	data() {
		return {
			username: '',
			password: '',
			msg: ''
		};
	},
	methods: {
		async login() {
			try {
				const credentials = {
					username: this.username,
					password: this.password
				};
				const response = await AuthService.login(credentials);
				this.msg = response.msg;

				const token = response.token;
				const user = response.user;

				this.$store.dispatch('login', { token, user });

				this.$router.push('/');
			} catch (error) {
				this.msg = error.response.data.msg;
			}
		}
	}
};
</script>
And this is what the route looks like in action:
9. Protect routes
Registration and login is complete. Now comes the part where we want to protect our route / and make it accessible only with valid user data. We go to the corresponding view and add a few lines to check if the user is logged in. If not, he will be redirected to the login page.
// src/views/Home.vue

<template>
	<div>
		<h1>Hi {{ username }}</h1>
		<p>{{ secretMessage }}</p>
		<input type="button" value="Logout" @click="logout" />
	</div>
</template>

<script>
import AuthService from '@/services/AuthService.js';

export default {
	data() {
		return {
			secretMessage: '',
			username: ''
		};
	},
	async created() {
		if (!this.$store.getters.isLoggedIn) {
			this.$router.push('/login');
		}

		this.username = this.$store.getters.getUser.username;

		this.secretMessage = await AuthService.getSecretContent();
	},
	methods: {
		logout() {
			this.$store.dispatch('logout');
			this.$router.push('/login');
		}
	}
};
</script>
We have also added a logout button to end the current session and the username will also be displayed. Of course everything is extendable and customizable. Our login system looks like this:
10. Conclusion
That?s it! In the second part we implemented the Vue.js frontend with the help of Vuex. We created a registration page, a login page, “normal” pages and pages protected by a login.
If you haven’t read part 1: Node.js Login System with Express, JWT & MySQL (Rest API) yet, you can do it directly to provide your login system with a backend component. With this we have implemented a complete login system, which you can use for your web applications. Thanks for reading! 🙂
When I run npm run serve I get the error: ERROR Failed to compile with 1 error 9:28:37 PM[eslint]C:\Users\Joe\Vue\login_register\vue\client\src\store\index.js 41:23 error ‘dispatch’ is defined but never used no-unused-vars
It looks like you’ve linting enabled and never used the ‘dispatch’ variable. Try to remove the import line for ‘dispatch’ in your store/index.js.
hey awesome tutorial thx, but i’m a little new into coding, I followed the tutorial line by line and I get “Cannot GET /login” whe I try to test it, do I need to enter some type of command before testing ?
Thanks! You can follow this Postman tutorial to test your RestAPI. The error says, that you have not registered your GET /login router correctly. The only “command” you need to execute is to call your Route e.g. http://localhost:3000/login. Hope this helps! 🙂
i’ve followed this tutorial and copied all code line by line and when i run npm client serve i get the standard vue welcome page. dont i need to modify App.vue to get to the login/register page?
Check your created() function in your Home.vue. There must be an redirect if
!this.$store.getters.isLoggedIn. Hope this helps 🙂Thank you for your tutorial. When i console.log AuthService.signUp(credentials) I get undefined.
Then check your axios response directly. Maybe there’s an error with your RestAPI? Do some console.log()s in your AuthService.js
Hey! great tutorial- I have a little problem, I tested the Sign Up an the Login it all works great, but when I get to the last step (9. Protect routes), I was faced with 2 errors,
– The first on being: [Vue warn]: Error in created hook (Promise/async): “TypeError: Cannot read property ‘username’ of undefined”
found in —> at src/views/Home.vue
at src/App.vue
– and the second: TypeError: Cannot read property ‘username’ of undefined
at _callee$ (Home.vue?76f2:31)
at tryCatch (runtime.js?96cf:45)
at Generator.invoke [as _invoke] (runtime.js?96cf:274)
at Generator.prototype. [as next] (runtime.js?96cf:97)
at asyncGeneratorStep (asyncToGenerator.js?1da1:3)
at _next (asyncToGenerator.js?1da1:25)
at eval (asyncToGenerator.js?1da1:32)
at new Promise ()
at eval (asyncToGenerator.js?1da1:21)
at VueComponent.created (Home.vue?76f2:27)
I Couldn’t find any solution for the error, does it have any thing to do with dispatch from: actions: {
login: ({ commit, dispatch }, { token, user }) => {…
any thoughts?
Note: I had also the following error from the eslint-loader but I just disabled lent on save for the time being to get rid of the error:
– \client\src\store\index.js
39:23 error ‘dispatch’ is defined but never used no-unused-vars.
Thanks in Advance
TN
Hey, thank you!
Check your store.js. It looks like the getter method
getUserdoesn’t work correctly. Output yourstatevariable and check what’s in it. Maybe that can help you. 🙂Greetings
LH
Hey bro , I also got the same error as above, let me ask you how to fix this
Thank you for reading my comments and have a good day
When i click sign up in sign up page, in console log says “TypeError: Cannot read property ‘data’ of undefined”, can you tell me whats’ wrong it is ?
Check if your try-catch block works correctly. It looks like you run into the catch block. Output the
errorvariable. And check if you get the right answer fromAuthService.signUp(credentials);.Hi, great tut – I have a workring result ? Now how do I deploy or build, so that I can upload it to my hosting-server and use it live? I have used a remote (live) Database from the start, so that should be set?
Hey, thanks! If you’re using Plesk you can follow this guide: https://webdeasy.de/en/deploy-node-js-app-with-plesk/
There are a few steps you have to do:
create a vue.config.js file in your client folder with the following content:
const path = require('path');

module.exports = {

	outputDir: path.resolve(__dirname, '../server/public'),

	devServer: {

		proxy: {

			'/api': {

				target: 'http://localhost:3000'

			}

		}

	}

};
Then you can run: npm run build
This will export your Vue App to a folder in your server folder. Than you need to publish all files/folders to your server (excluding the client folder) and start your Node.js App (server/index.js) on it. For example with the Plesk guide. 🙂
Hope this helps!
LH
Thanks – But I don’t need the node-server now that I am uploading to an actual server, do I? I though I only had to upload the lib, middleware and routes folders (or something like that) and I was good to go?
You need a node server, too. This node application is to manage the serverside routes. The vue application is only frontend and you need both parts to use this app. Generally every application with an RestAPI needs a node server.
LH
Cool I got it working live not (using Heroku – because its free) – Thx! If I want to hide elements (like navigation items), can I then use a v-if-statement to do so?
That’s great! Of course, just add the v-if directive to the div (or whatever) to hide.
Can you show how – each time I try it crashes…
https://webdeasy.de/en/complete-login-system-with-node-js-vue-js-vuex-part-2-2/#sign-up-page
Like line 14 in this code. You just have to enter your variable instead.
isnt something is off with store.js?
Authservice is defines (line 8) but never used :/
dispatch (line 43) , but i never see it used.
getting “[Vue warn]: Error in created hook “. authorization is denied. any tips?
Hey! I removed line 8 with “AuthService”, i forgot it while coding.. sorry :/
And you can usually ignore warnings for now…
LH
Hi LH,
I’m still a little confused about what you need to add/remove concerning AuthService in line 8 or 42. Can you please help and specify because I’ve got the same error? That would be brilliant!
Hi Leo,
you don’t need to change anything. I have adjusted it in the tutorial.
Is it a warning or an error? And do you use the Node.js RestAPI I wrote in the first part?
Greetings
Lorenz
is it possible to have the source code?
Also you can know how the project was created including part 1 (eg npm create …), given I am a newbie.
Comuque is a nice example.
Hey! The whole source code is on this page and the first tutorial (https://webdeasy.de/en/complete-login-system-with-node-js-vue-js-restapi-jwt-part-1-2/). You can copy them out of the code boxes. 🙂
LH