CI/CD in Plesk: Deploy Node.js, React, Angular, Vue & Co. automatically


")


With Plesk CI/CD, you can automatically deploy Node.js, React, Angular, Vue and other technologies to the server. In this article, I’ll show you how Plesk CI/CD can be used to automate deployment processes and reduce development time.
When developing fullstack applications with Node.js, Deno and frontend frameworks like Vue, React or Angular, the deyploment process, i.e. the step in which the developed application is put live, is always similar. Doing this manually takes a lot of time and is also very error prone when done manually. And this is exactly where CI/CD comes into play.
In my blog post What is CI/CD?, you can find out everything about the concept of CI/CD, CI/CD tools and DevOps.
What to expect in this tutorial:
We build a complete Plesk CI/CD pipeline. You commit local changes to your develop branch in the remote repository and create a pull request (PR) to your main branch. Your app is automatically tested and your source code is formatted (linting) and if successful everything is pushed to your main branch. The frontend is then automatically built. Plesk detects these changes and automatically deploys all changes to your users. You can also use this workflow for static websites.
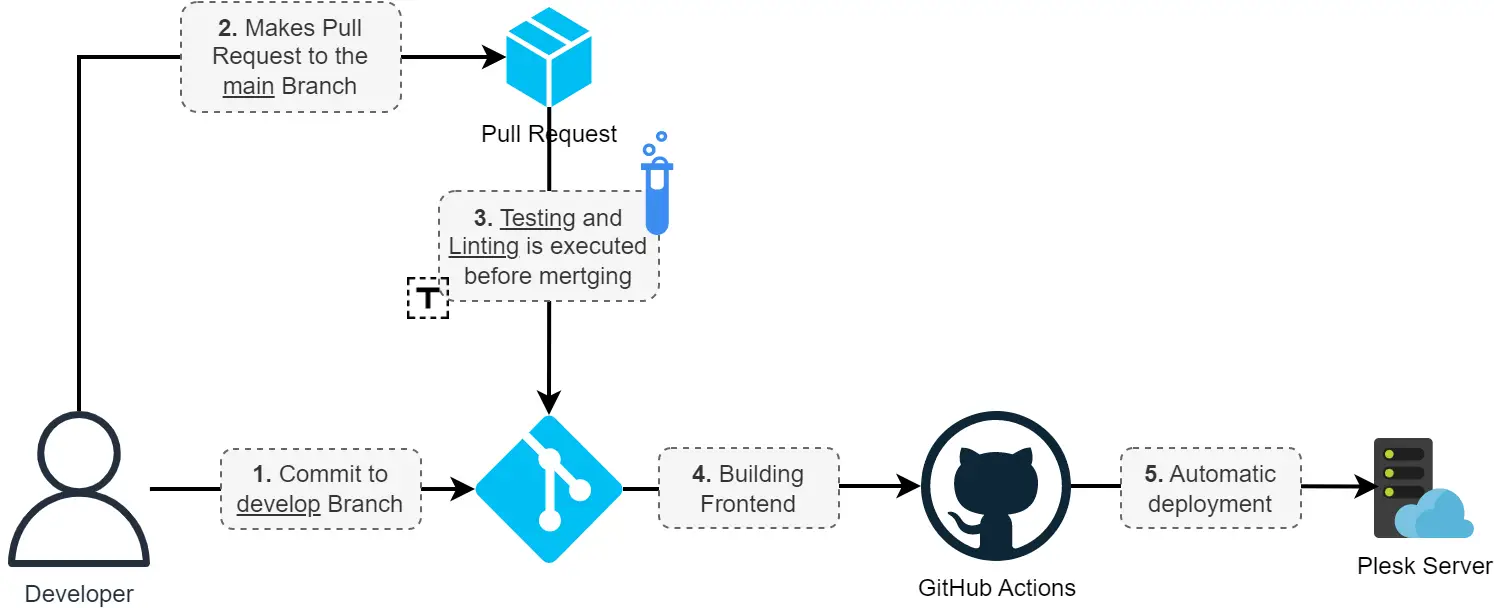
This diagram is meant to visualize how the complete Plesk CI/CD pipeline looks like including all steps. Take a moment and have a close look at the individual steps.
Prerequisites/Assumptions
At the beginning, I make a few assumptions about the app that the pipeline will be developed according to. Of course, it doesn’t matter if you have other assumptions, you will have to adjust your Plesk CI/CD pipeline in a few places.
- Backend and frontend are in separate repositories (preferably GitHub, as I use GitHub Actions here).
- The frontend is created with a JS framework (e.g. Vue, React or Angular). Accordingly,
npmoryarnis used. - The backend is a Node.js application
- The Plesk Git extension must be installed in your Plesk (by clicking on Extensions > “Git”).
GitHub Actions: Create CI/CD Workflows
With GitHub Actions, we can create different workflows, each of which takes care of a specific task in our CI/CD pipeline. You create a new workflow as follows.
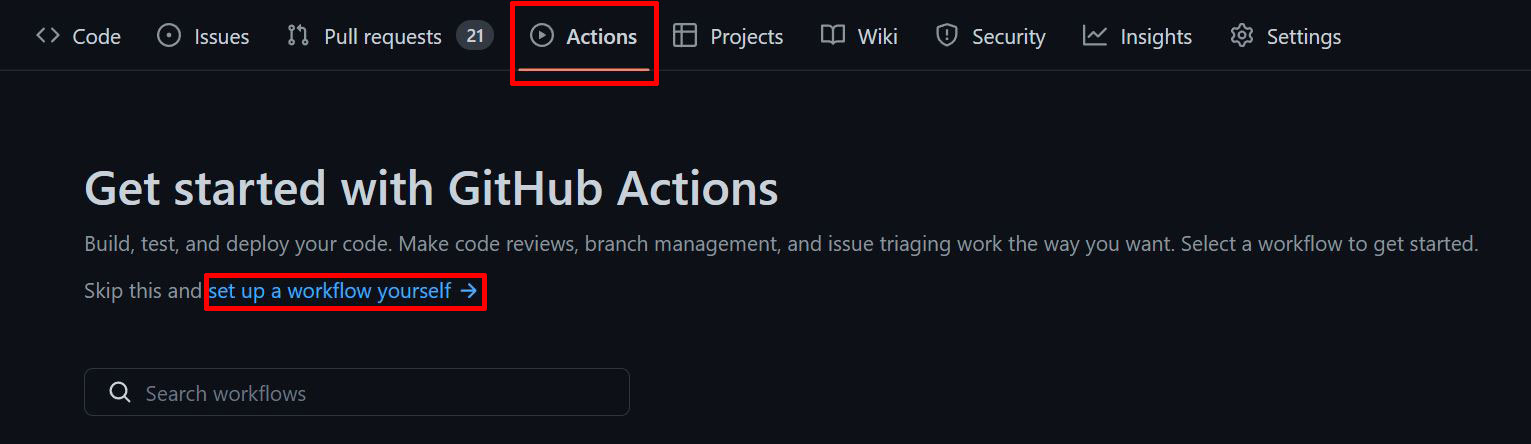
You get this editor that provides a file in YAML format.
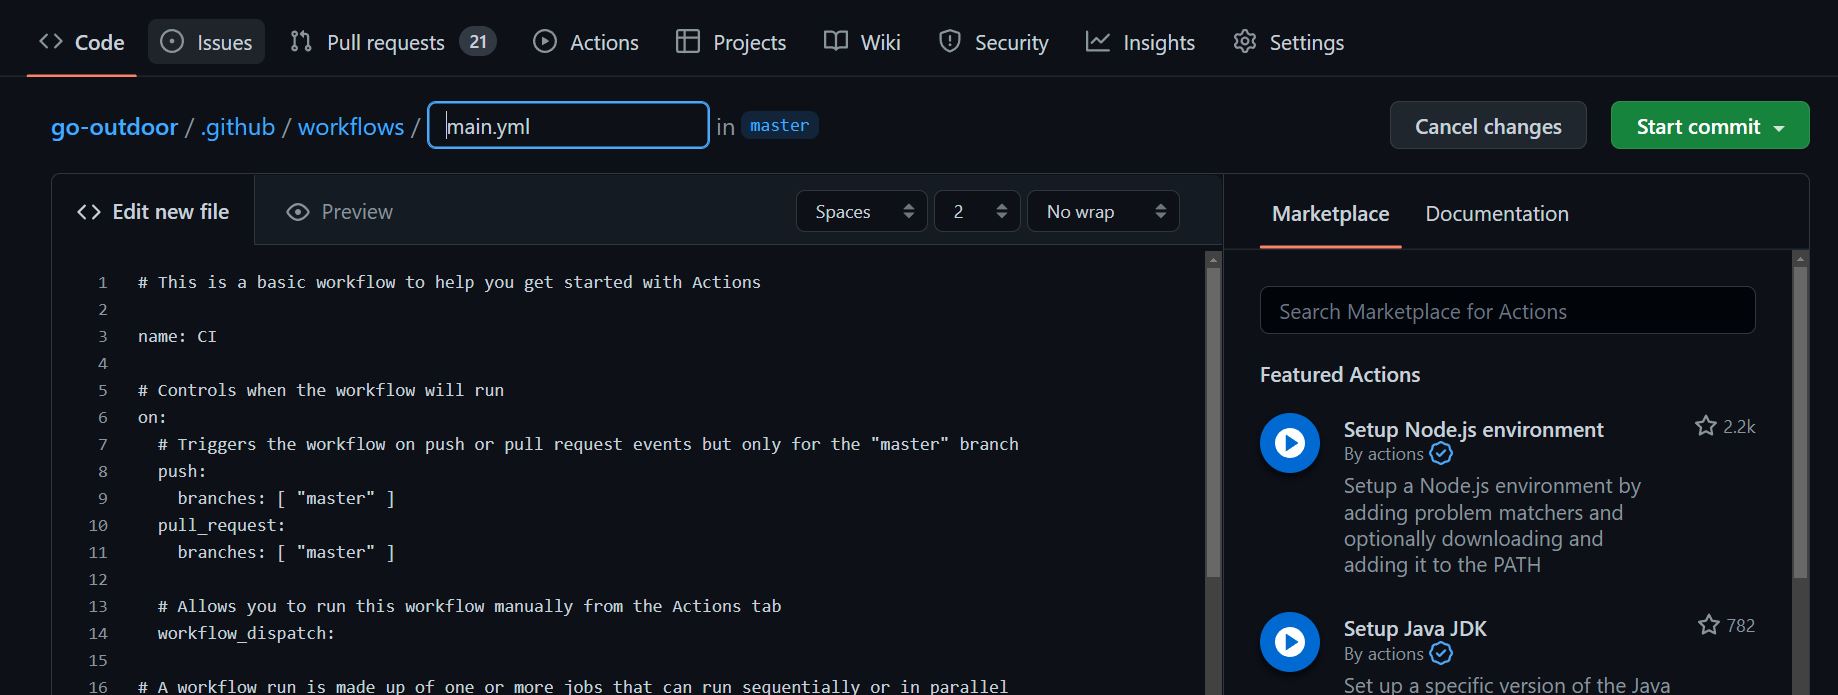
Now here we create different YAML files for each step in our pipeline.
Run unit tests
If you have created unit tests for your code, e.g. with Mocha or supertest, you can use the following YAML file. If your code does not contain any tests, I can only strongly recommend you to create some. In another article I already showed how you can use ChatGPT to generate unit tests or Postman to test your Rest API.
name: Execute Unit Tests

on:
  push:
    branches: [ "develop" ]
  pull_request:
    branches: [ "main" ]

jobs:
  test:

    runs-on: ubuntu-latest

    strategy:
      matrix:
        node-version: [16.x]

    steps:
    - uses: actions/checkout@v3

    - name: Use Node.js ${{ matrix.node-version }}
      uses: actions/setup-node@v3
      with:
        node-version: ${{ matrix.node-version }}
        cache: 'npm'

    - name: Install dependencies and run tests
      run: |
        npm install
        npm run test
      env:
        CI: true # set environment variable to run tests in CI mode
I have named this file testing.yml. It is executed when a commit arrives on the develop branch or a pull request is created on the main branch. It first loads the current code from the repo, then installs all dependencies and then runs npm run test. Of course, your package.json must also have the appropriate script in it. This is what the section in package.json looks like if you use Mocha as your test framework and your tests are in the test/ folder:
{
  [...]
  "scripts": {
    [...]
    "test": "mocha test/**/*.test.js",
    [...]
  },
  [...]
}
Run Linting/Formatting
I can also only strongly advise you to set up a linter or formatter for your project. This automatically checks and corrects the code formatting. Especially when working with multiple developers, this is a great advantage to ensure code quality. The YAML file for GitHub Actions can look like this:
name: Execute Linting
on:
  push:
    branches: [ "develop" ]
  pull_request:
    branches: [ "main" ]

jobs:
  test:

    runs-on: ubuntu-latest

    strategy:
      matrix:
        node-version: [16.x]

    steps:
    - uses: actions/checkout@v3

    - name: Use Node.js ${{ matrix.node-version }}
      uses: actions/setup-node@v3
      with:
        node-version: ${{ matrix.node-version }}
        cache: 'npm'

    - name: Install dependencies and lint code
      run: |
        npm install
        npm run lint
      env:
        CI: true # set environment variable to run tests in CI mode
And in the package.json again the appropriate script must be deposited. Here as an example when using eslint.
{
  [...]
  "scripts": {
    [...]
    "lint": "./node_modules/.bin/eslint .",
    [...]
  },
  [...]
}
Build frontend
When we develop locally we always start a development server on our machine. For the live run (production) we have to run a command like npm run build or similar. Now we want to automate this process.
The following template is used to run multiple jobs. The dependencies are installed, the code is linked again and the frontend is built. Optionally, you can add the execution of unit tests here again.
In the last step we push the complete build to the branch build of the same repository. You will probably need to adjust the highlighted line. Here you specify the name of the folder where your frontend was built. For Vue.js this is the dist/ folder by default. For React this is usually the public/APPNAME/ folder. However, the path can also be customized via the config of the respective JS framework.
name: Build Application

on:
  push:
    branches: [ "main" ]

jobs:
  test-and-build:

    runs-on: ubuntu-latest

    strategy:
      matrix:
        node-version: [16.x]

    steps:
    - uses: actions/checkout@v3

    - name: Use Node.js ${{ matrix.node-version }}
      uses: actions/setup-node@v3
      with:
        node-version: ${{ matrix.node-version }}
        cache: 'npm'

    - name: Install dependencies
      run: |
        npm ci

    - name: Lint code
      run: |
        npm run lint
      env:
        CI: true # set environment variable to run tests in CI mode

    - name: Build Frontend
      run: npm run build
      env:
       CI: false

    - name: Push to build branch
      uses: s0/git-publish-subdir-action@develop
      env:
        REPO: self
        BRANCH: build # The branch name where you want to push the assets
        FOLDER: ./dist # The directory where your assets are generated
        GITHUB_TOKEN: ${{ secrets.ACCESS_TOKEN }} # GitHub will automatically add this - you don't need to bother getting a token
        MESSAGE: "Build: ({sha}) {msg}" # The commit message
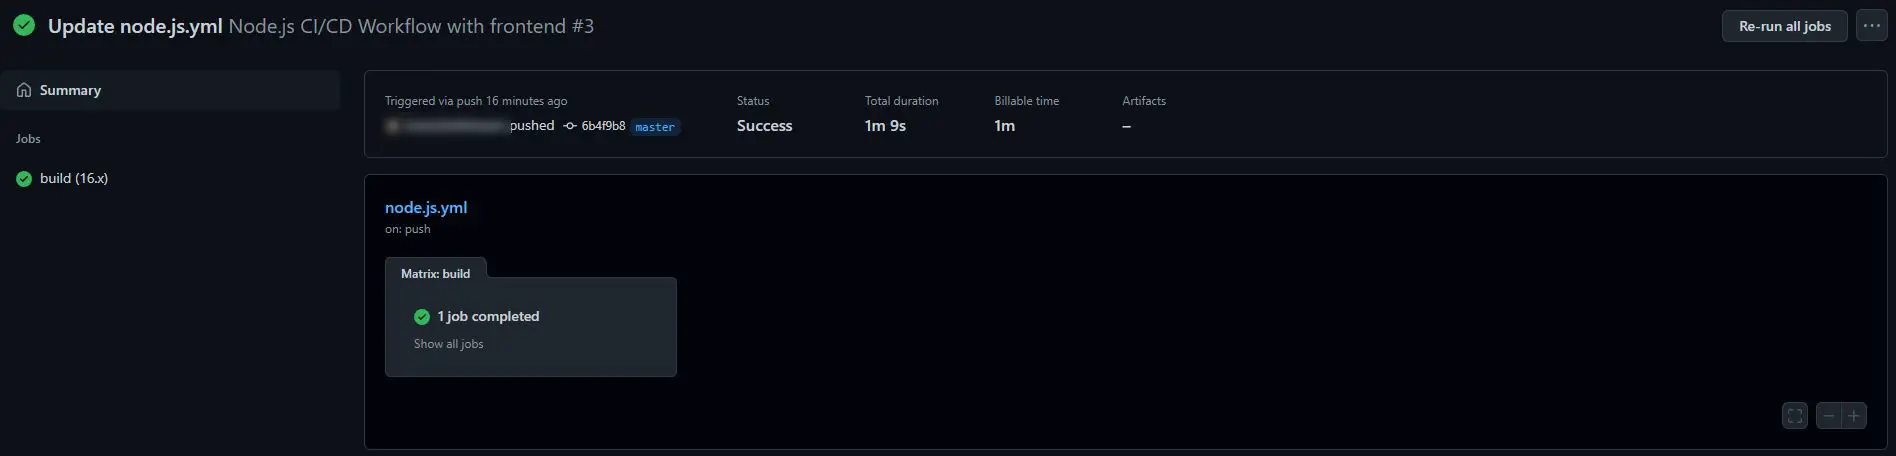
As soon as you save the workflow file, the job is automatically executed and your frontend is built and pushed to the build branch. This can take 1-2 minutes depending on the frontend.
Set up Git repository in Plesk
The next step is to set up our two Git repositories in Plesk. We set up a different deployment for the frontend and the backend.
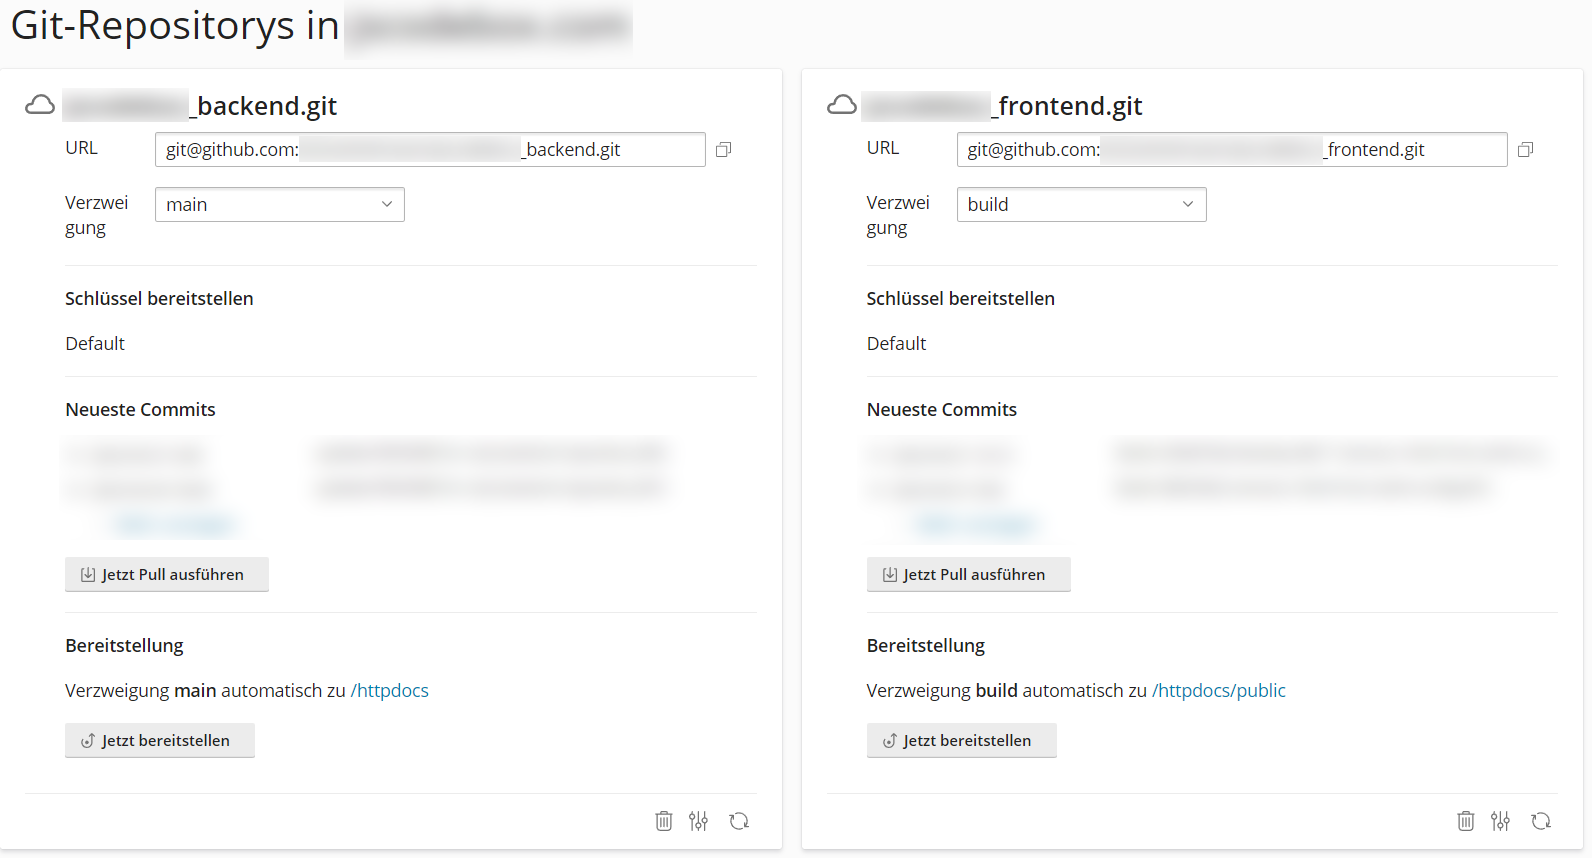
Backend
Select the following settings for the backend repository:
- Use the SSH repository URL of your backend (git@github.com:USERNAME/REPO.git)
- Branch: main
- Provisioning mode: automatic
- Server path: /httpdocs
- Provisioning actions (to delete unneeded files directly):
- touch tmp/restart.txt
- rm -R .github/
- rm .env.template
- rm -R test/
- rm README.md
- rm .gitignore
- rm .eslintrc.js
For everything you need to know about hosting a Node application, check out my in-depth post on Node.js app hosting with Plesk.
Frontend
The second repo instance in Plesk is for the frontend only. Select the following settings here:
- Use the SSH repository URL of your frontend (git@github.com:USERNAME/REPO.git)
- Branch: build (if this does not exist yet, create it, we need it later)
- Server path: /httpdocs/public
- Provisioning mode: automatic
We do the display of the frontend via our backend. To do this, we need to add the following lines to the index.js of the Node.js app:
// handle production
if (process.env.NODE_ENV === "production") {
  // static folder
  app.use(express.static(__dirname + "/public"));

  // handle SPA
  app.get(/.*/, (req, res) => res.sendFile(__dirname + "/public/index.html"));
}
I have a Node.js backend with express web server. If you use other technologies, you can rewrite it accordingly.
Up to this point, our files are deployed when we manually execute the pull in Plesk. So when we commit locally and push it to our remote repository we would always have to log into Plesk and click the “Pull Now” button. We configure these automations in the next step.
Plesk Git SSH Key Set Up in GitHub
But before that, we need to allow Plesk to access our private GitHub repository. To do this, we need to copy the public SSH key created by Plesk.
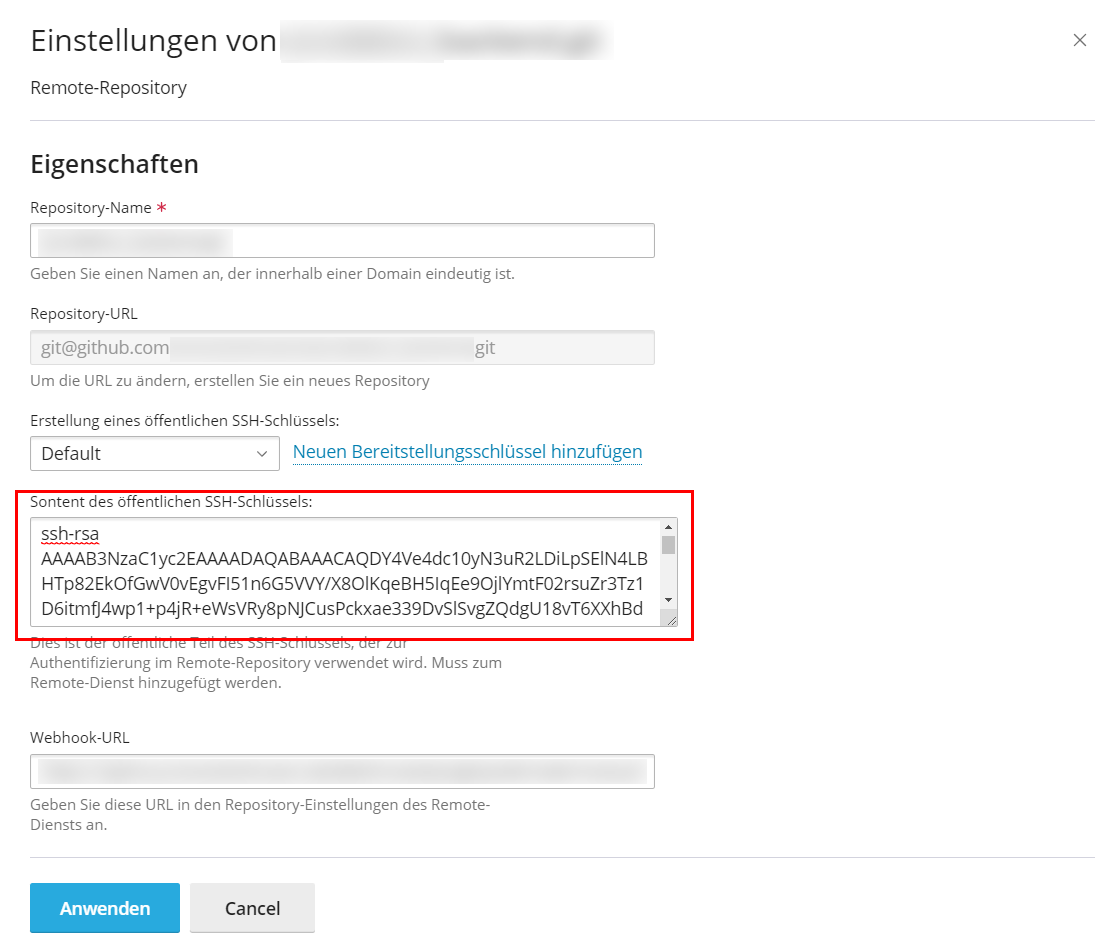
You need to add this key to your GitHub account under Settings > SSH and GPG Keys > New SSH key.
For detailed instructions on this step, see my post Cloning a Private GitHub Repository with Plesk.
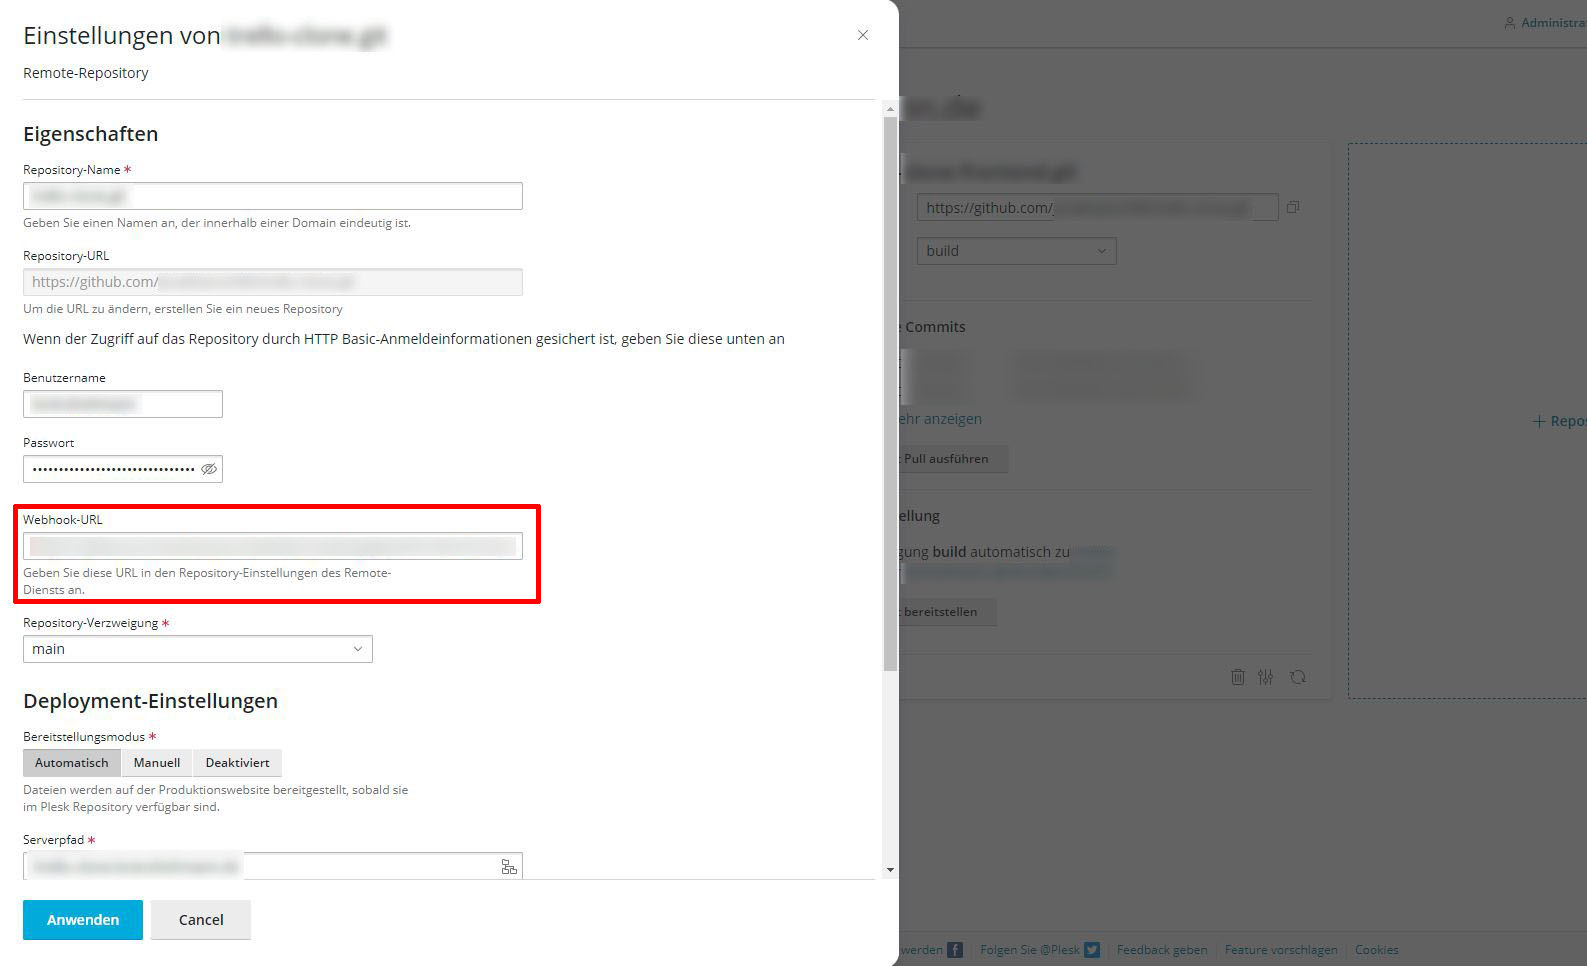
Webhooks: Automatic retrieval of new commits
What we have so far: Frontend and backend are now hosted in the right directories on our Plesk server and our frontend is built automatically with GitHub Actions. The only thing missing for a complete Plesk CI/CD workflow is that new commits are automatically detected and deployed by Plesk. For this we use webhooks.
In the repository settings in Plesk you will find a webhook URL that you have to copy out.
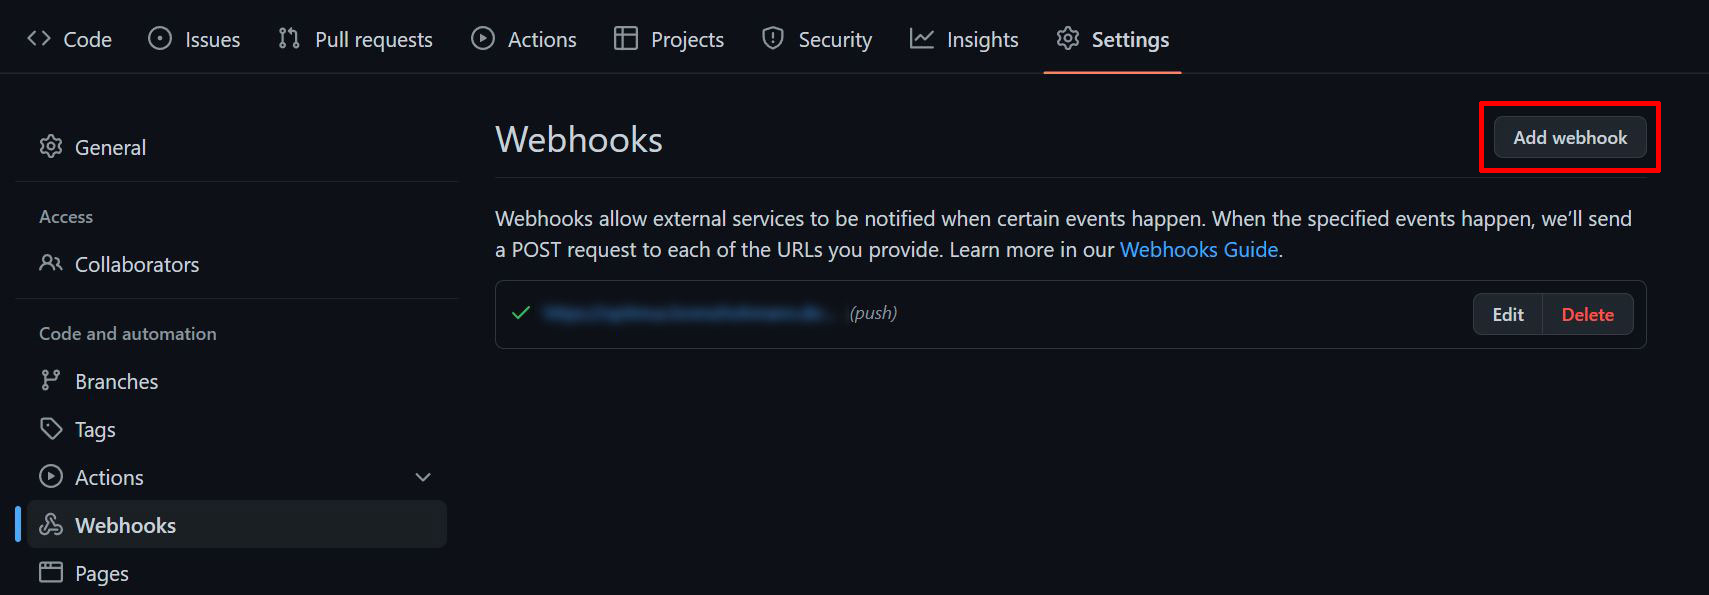
Then go to the repository settings in your GitHub repo under Settings > Webooks and click Add webhook. Here you add the URL and leave all other settings at their default values.
If your workflow does not work and error messages with missing permissions appear, you may need to generate a new token under GitHub Settings > Developer seettings > Personal access tokens > Tokens (classic) and allow all permissions on “repo”.
That’s it! All components of our Plesk CI/CD pipeline are up and running.
Setting up the workflow certainly took some time, but it will save a lot of time in the future. 🙂
-
Pingback: What is CI/CD? Definitions, concepts and CI/CD tools at a glance
-
Pingback: ChatGPT and AI in software development (best practices)
-
Pingback: Docker vs. Virtual Machines: Understanding the key differences