Using Bitbucket Repository via SSH in Plesk


")


You want to use a (private) Bitbucket repository in your Plesk installation? No problem, let me show you how to do that.
Our everyday life as developers is increasingly concerned with version control of software. Many companies use Git for this purpose. A good step in the right direction to optimize and control the software development process. A popular provider for Git repositories is Bitbucket as well as Github.
To manage live servers (hosting, mails, DNS, etc.) some companies and individuals use the Plesk software, which – in my opinion – is simply brilliant! And this is exactly where Git can be used to provide web applications and other applications. With this simple trick, you can then use private Bitbucket repository in Plesk.
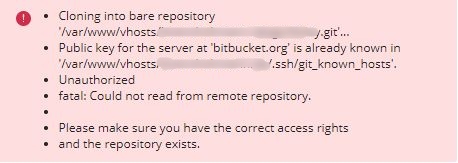
If you have already tried this, you may have come across an error message like this:
Unauthorized
fatal: Could not read from remote repository.
Please make sure you have the correct access rights and the repository exists.
To let Plesk know that it is the owner of the private repository, SSH key pairs must be exchanged. The key must be in Plesk and added to your repository. How to do this is explained in this guide.
1. Install Git for Plesk
First you need (logically) the extension “Git” for your Plesk installation. You can find it in Plesk in the left menu under “Extensions”.
Did you know: Plesk makes it easy and free to use your own feature-rich secure cloud. Read more in my article about installing Nextcloud.
2. Add repository to your domain
Now go under the desired domain to “Git” and to “Add Git Repository”. There you choose “Remote Git hosting like GitHub or Bitbucket”.
3. Inserting a Repository Link
The link to your Bitbucket repository must be specified here. It looks like this:
https://USERNAME@bitbucket.org/USERNAME/repo.git. Now we remove the protocol from the link and replace a slash with a colon:
USERNAME@bitbucket.org:USERNAME/repo.git. Now insert the link into the “Remote Git Repository” field. Then your interface should look like this:
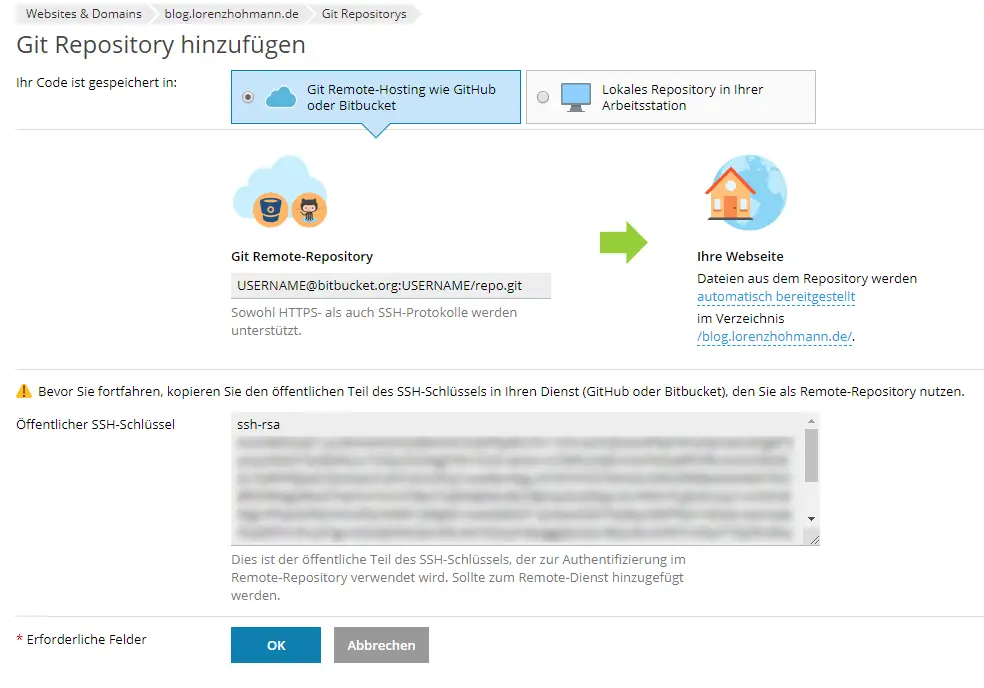
4. Share SSH key
A field “Public SSH key” appears. Now we go to our Bitbucket repository, which we want to include. Here we navigate to “Settings -> Access keys”. There we click on “Add key” and insert the key into the field “Key”:
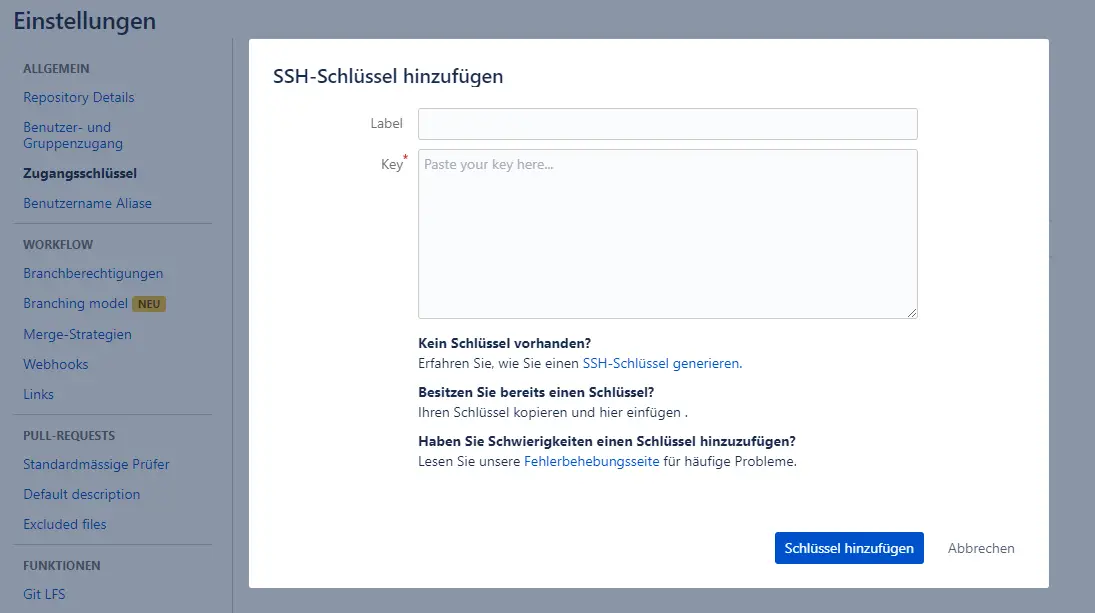
Optionally we can set a label (title). Now click on “Add key”.
5. Adding and Cloning a Repository
Then we can confirm with “OK” in Plesk. Your Plesk should now be able to clone the repository.
It wasn’t that hard, was it? Here are more posts about Plesk, maybe you’ll find something that interests you:
-
Pingback: Node.js in Plesk: Installation and hosting of your application